------------------------------------------------------
opencv officail home
------------------------------------------------------
http://opencv.org/
------------------------------------------------------
download
------------------------------------------------------
http://opencv.org/downloads.html
1. extract donwload opencv package where do you want to install
- I used opencv 2.4.6
- My installation DIR is C:\opencv_2.4.6
- I test it under VC10
2. set opencv enviroment variable and add path
- open console then enter below command
$ setx -m OPENCV_DIR C:\opencv_2.4.6\build\x86\vc10
- add path
%OPENCV_DIR%\bin
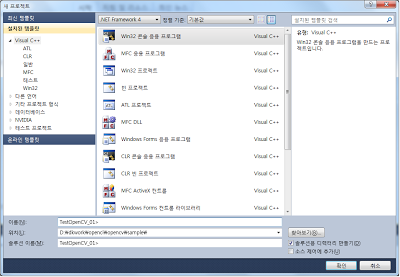
3. create sample project in VS

4. select property manager(?) tab and right click Debug | Win32 then add new project propery
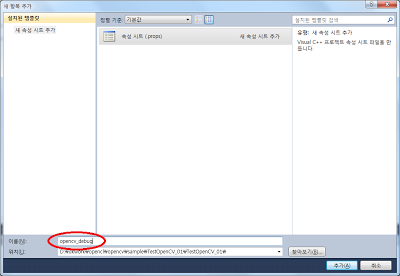
 5. Type the name then create
6. right click the create property sheet, then select propery
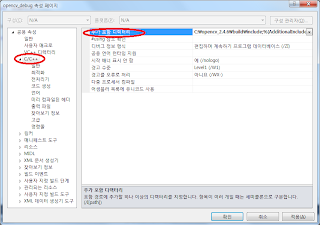
7. move c/c++ then add additional include directory C:\opencv_2.4.6\build\include

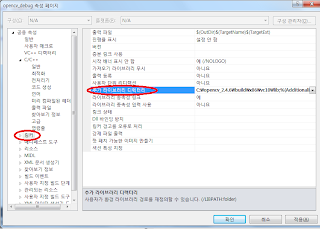
8. move link, then add additional library directory C:\opencv_2.4.6\build\x86\vc10\lib

8. move link, input directory then add additional dependency and add below libs
opencv_core246d.lib
opencv_imgproc246d.lib
opencv_highgui246d.lib
opencv_ml246d.lib
opencv_video246d.lib
opencv_features2d246d.lib
opencv_calib3d246d.lib
opencv_objdetect246d.lib
opencv_contrib246d.lib
opencv_legacy246d.lib
opencv_flann246d.lib
opencv_imgproc246d.lib
opencv_highgui246d.lib
opencv_ml246d.lib
opencv_video246d.lib
opencv_features2d246d.lib
opencv_calib3d246d.lib
opencv_objdetect246d.lib
opencv_contrib246d.lib
opencv_legacy246d.lib
opencv_flann246d.lib
9 .make main functin as like below
#include "stdafx.h"
#include <opencv\cv.h>
#include <opencv\highgui.h>
#include <opencv\highgui.h>
int _tmain(int argc, _TCHAR* argv[])
{
IplImage * image = cvLoadImage("C:\\Hydrangeas.jpg", 1);
cvShowImage("test image", image);
cvWaitKey(0);
cvWaitKey(0);
cvReleaseImage(&image);
return 0;
}
}
then build and run


